Setup
This guide will walk you through the setup and configuration of our custom Raspberry Pi image.
The instructions target the most recent image version.
Requirements
Before you begin, make sure you have the following:
- A supported Raspberry Pi model
- microSD card flashed with the latest Raspberry Pi image
- HDMI or GPIO display
- Power supply for the Raspberry Pi
- A heatsink for the Raspberry Pi (recommended).
Preparation
- Install the heatsink on your Raspberry Pi (recommended).
- Insert the SD card into your Raspberry Pi.
- Connect the display:
- HDMI for standard displays.
- GPIO for specialized displays.
- Connect your Raspberry Pi to the power supply.
Once connected, your Raspberry Pi should start booting. You should see the Raspberry Pi OS boot sequence on your display.
If you're using an HDMI display on a Raspberry Pi 4, ensure the HDMI cable is plugged into the micro HDMI port closer to the USB-C power connector.
If you're using a GPIO display, you won't see anything on the display yet. It will likely appear completely white or black, which is expected until you install the required driver later.
Accessing the Configuration Page�
After starting the Raspberry Pi, you will need to access the configuration page. The method depends on how your Pi is connected to the network.
Wireless Mode
If no Ethernet cable is connected, the Raspberry Pi will automatically start in wireless mode.
- A Wi-Fi configuration hotspot named MoBro_Configuration is automatically created.
- Use a wireless device (e.g., phone or laptop) to connect to this hotspot (no password required).
- Open a browser and go to 192.168.4.1 by typing it into the address bar.
The Raspberry Pi display will also show these instructions.
If your phone is unable to open 192.168.4.1, you may need to temporarily disable mobile data.
For GPIO displays, you still won't see anything yet. Just give the Raspberry Pi a minute or two to boot, then check for the configuration hotspot.
Ethernet Mode
If your Raspberry Pi is connected to a network via Ethernet, it will automatically switch to Ethernet mode. A configuration hotspot will not be created.
- Check the Raspberry Pi's IP address on your network.
- Open a browser on a device connected to the same network and navigate to the Raspberry Pi's IP address.
Initial Configuration
After you successfully open the configuration page, it's time to configure the Raspberry Pi. This process is typically done only once. The configuration page initially displays the currently active settings.
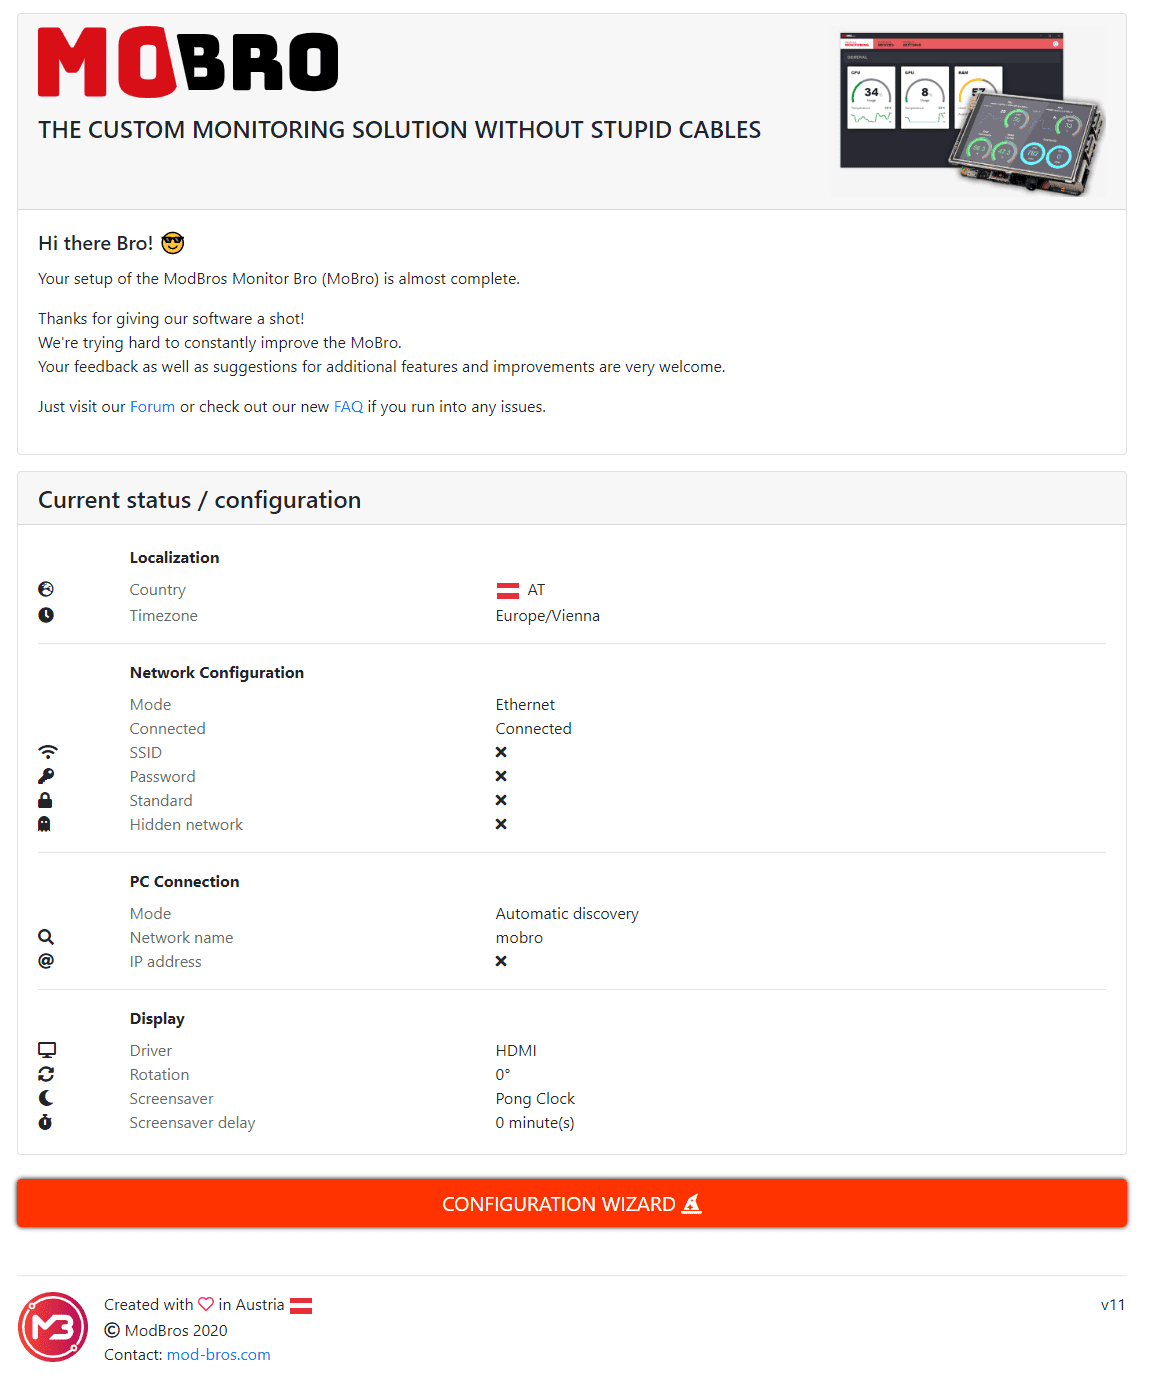
To start the configuration, click the 'Configuration Wizard' button at the bottom. This will open an interactive wizard to guide you through the process.
Localization
First, we need to configure localization settings.
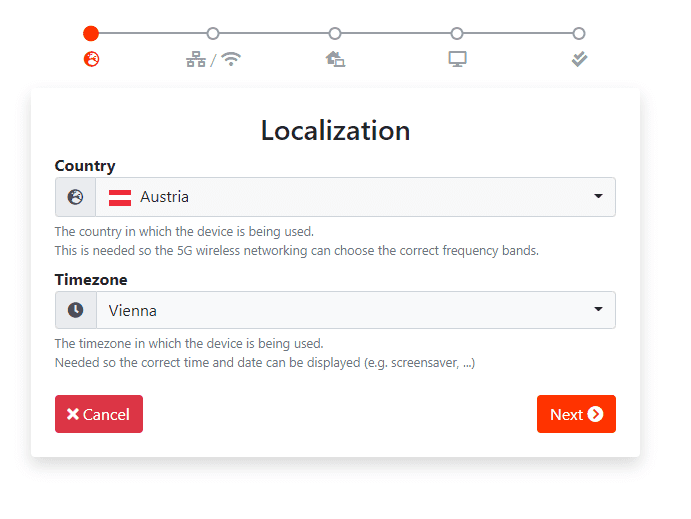
- Country: If using a 5GHz wireless network, select your country to ensure the correct frequency bands are used.
- Timezone: Set the timezone for the correct date and time display (e.g., for screensavers).
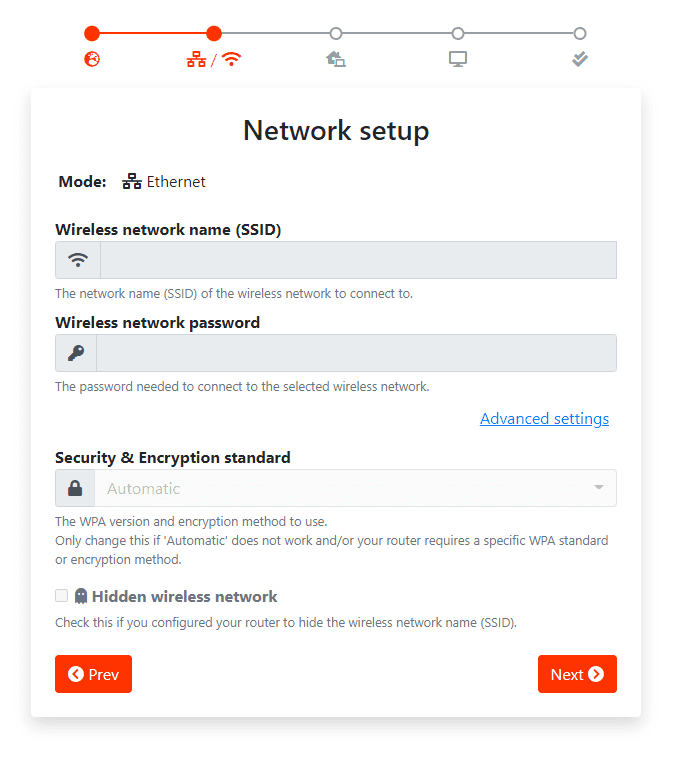
Network
Next, configure the network settings.
-
Ethernet Mode: If the Raspberry Pi is in Ethernet mode, skip this section, as the network is already set up.
-
Wireless Mode:
- SSID: Select or manually input the wireless network's SSID.
- Password: Provide the network password. Your credentials are stored locally on the Raspberry Pi and are not shared with anyone.
- Advanced Settings: Specify WPA version or encryption (if needed). Hidden networks can also be configured here.
PC Connection
For the Raspberry Pi to display its dashboard, it needs to connect to your PC running the MoBro desktop application.
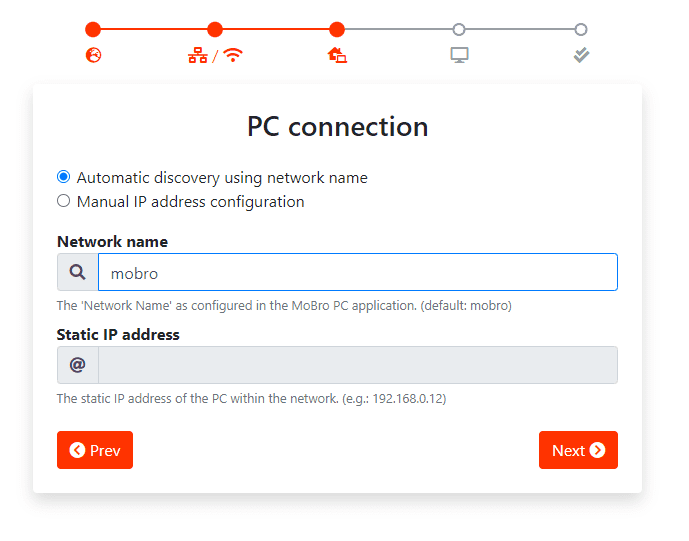
You have two connection options:
-
Automatic Discovery: The Raspberry Pi automatically scans the network for a PC running the MoBro application.
- Make sure the Network Name matches the one configured on your PC application.
- By using the network name, the Raspberry Pi can distinguish between multiple PCs in the same network.
- If you have only one PC, leave this as default: mobro.
-
Static IP: Manually input your PC's IP address for faster and precise connection.
Screen Setup
Configure the connected screen. If your screen is connected via HDMI and already working, you can skip this section.
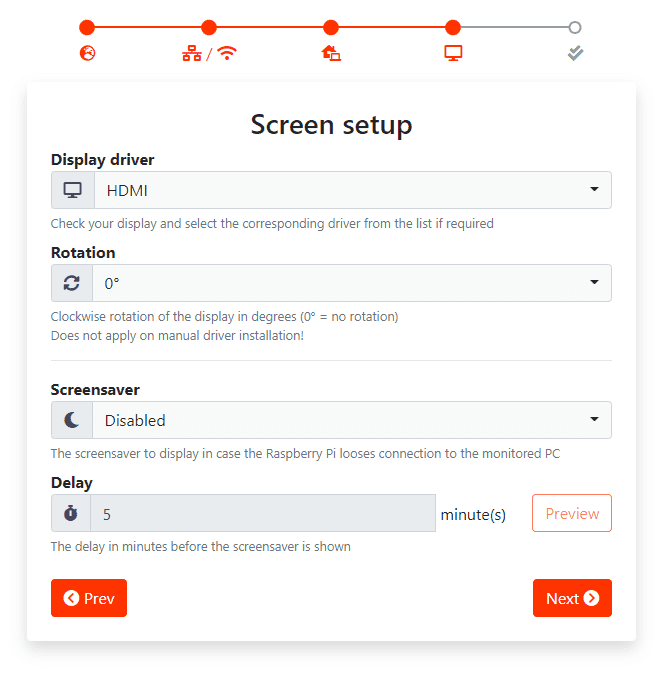
- Display Driver: For GPIO displays, select the appropriate preloaded driver from the dropdown menu. If no suitable driver is listed, select 'Manual Installation' to install manually via SSH (refer to additional documentation).
- Rotation: Rotate the display to match its orientation. Specify in degrees clockwise (e.g., 90°, 180°).
Note: Rotation is not applicable if manually installing a driver. - Screensaver: Enable and configure a screensaver for when the Raspberry Pi loses connection with the monitored PC.
- Delay: Set a delay (in minutes) before the screensaver activates after losing connection.
Summary & Confirmation
At the final step, review your selected configuration settings.
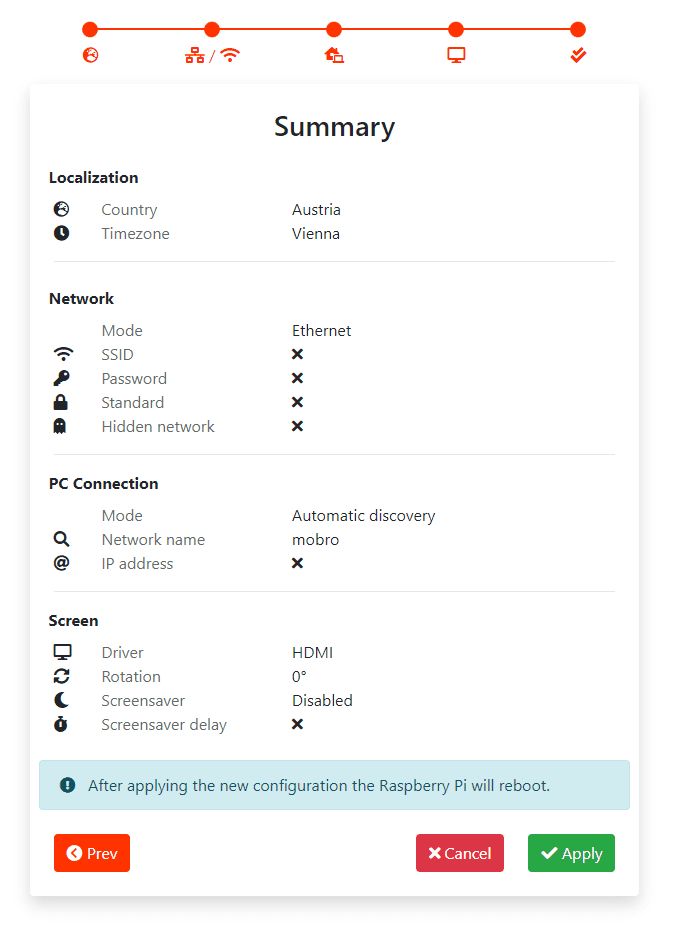
If everything looks correct, click 'Apply.' The Raspberry Pi will write your settings and trigger a reboot. For GPIO screens, ensure the correct driver is installed, and once rebooted, the MoBro dashboard should appear.
The Raspberry Pi needs to reboot twice to apply the configuration. Depending on the model, this may take a few minutes.