Download & Flash
This guide will walk you through the process of downloading and flashing our custom pre-configured Raspberry Pi image.
If you prefer using your own custom Raspberry Pi OS installation, please refer to the Browser Setup section.
Requirements
Before proceeding, ensure you have the following:
- A microSD card with a minimum capacity of 4GB (class 10 or higher is recommended for faster performance; slower cards may work, but the Raspberry Pi will take longer to boot).
- One of these flashing tools (or similar software):
Download the Image
You can download the Raspberry Pi image from our website or directly using the link below:
Download Raspberry Pi Image
After downloading the file, extract the .zip archive.
Note that the file is compressed using LZMA2, which is not supported natively on Windows.
To extract it, you will need tools like 7-Zip or WinRAR.
Flash the Image
Once the image has been extracted, follow these steps to flash it onto your microSD card:
-
Connect your microSD card to your computer.
-
Open your preferred flashing tool, such as balenaEtcher or Raspberry Pi Imager.
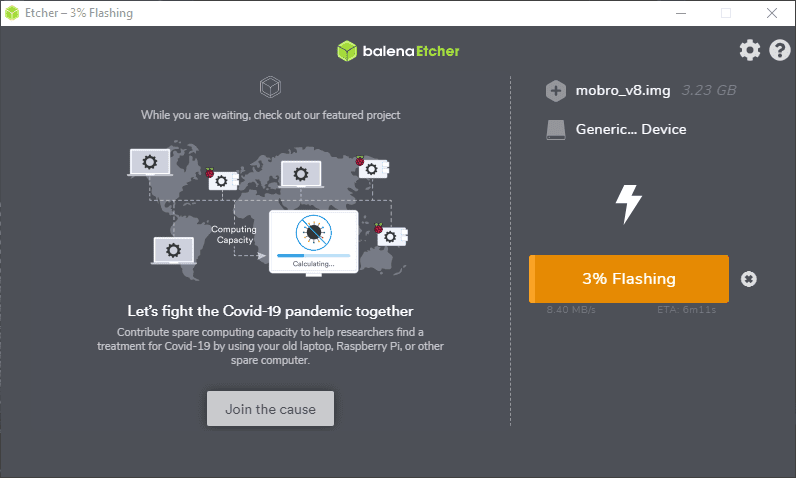
NOTE: The screenshots below use balenaEtcher, but you can use any compatible flashing program.
-
Steps to flash using balenaEtcher:
- Select the downloaded image file.
- Choose your connected microSD card.
- Click the Flash button.
- Confirm any prompts that appear.

-
Wait for:
- The flashing process to complete.
- Validation of the flashed image to finish.
- Once done, securely eject the microSD card from your system.
Done!
Your microSD card now contains the custom Raspberry Pi image and is ready to use!